Volumes and areas of irregular shapes and solids
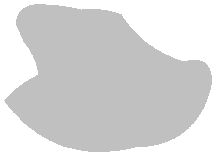
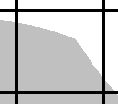
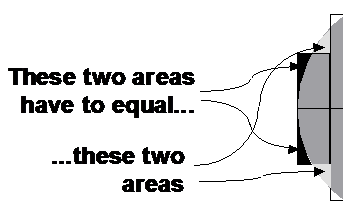
You don’t always get asked to calculate the area of a regular shape like a square, rectangle or circle. Sometimes, you’ll get very weird looking shapes, perhaps something like this one:
Sponsored Links
There are no formulas for finding the area of weird shapes like these. One way to find the area of a shape like this is to draw a square grid over the top of it, like this:
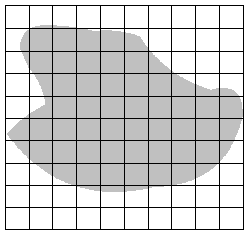
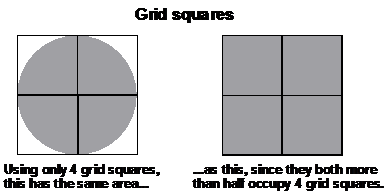
Now, using this grid we can work out the area of the shape in terms of number of grid squares. What we do is count the number of grid squares that are more than half filled by the shape. If a square is more than half filled by the shape, then it counts as ‘1’. If the square is less than half filled by the shape, then it doesn’t count.
|
|
|
|
Doesn’t count as a filled square |
Does count as a filled square |
As you count the squares you can write down the number you’re up to in the actual square, this helps you keep track of where you are. You should end up with something which looks a little like this:
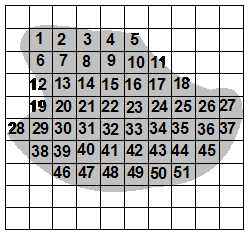
So the area of this shape is about 51 grid squares. Often in a question, each grid square will represent a standard measurement of area – perhaps a square metre for instance. Then you can give your answer in actual real measurement units – 51 m2.
Using rectangular strips to measure area
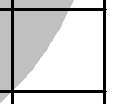
You aren’t limited to only using little grid squares to approximate the area of an irregular shape. You can also draw thin rectangular strips over the top of a shape as well and use them. For instance, say we didn’t know the formula for the area of a circle. We could find the area of a circle by drawing and measuring strips of a certain width over the top of the circle. Say we had a circle like this:
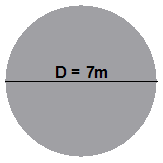
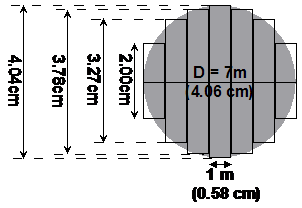
We could draw a set of vertical, or horizontal thin rectangular strips over the top of it. We need to decide how wide our strips are going to be. The diameter of the circle is 7 metres, so if we chose a strip width of 1 metre, we’d be able to fit 7 strips across it. Let’s try that, using vertical strips:
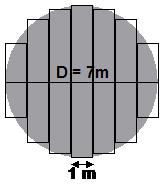
Notice how I’ve drawn each of the vertical strips. Because the circle is a round shape, it does not fit ‘nicely’ inside the strips. This means you have each strip partly empty, but also with circle outside it. You need to draw a strip so that the amount of circle outside the strip is the same as the amount of empty space inside the strip:
Now what we need to do is measure how long each of these strips is. First of all, remember that the circle we’re drawing is supposed to be 7 metres in diameter. We’re obviously drawing a scale diagram. If I measure the length of the diameter on my diagram, I find that it is 4.06 cm long. This means that 1 centimetre on my diagram is the same as 1.724 metres.
So what I can do is work out the area of my scaled circle in square centimetres first. Then I can convert it using my scale of 1 centimetre for every 1.724 metres.
Each strip is 0.58 centimetres wide on my diagram. So to work out the total area in square centimetres, I just need to add up the areas of each of the strips. Remember that there is two of every strip except for the central one:
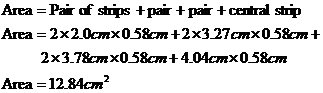
So in our diagram, the area of the circle is 12.84 cm2. What we’ve got to remember is that this circle is a scale drawing of an actual circle 7 metres in diameter. So we’ve got to scale up this 12.84 cm2. Now, we already know that 1 centimetre on our diagram represents 1.724 metres on our actual circle. So you might just jump to the conclusion that we need to multiply our answer in centimetres by 1.724. Wrong!!! 1 centimetre is a unit of length, but what we’re dealing with are units of area. We want to know what one square centimetre represents in terms of square metres. Well, by squaring our ‘1 cm = 1.724 metres’ equation we can work this out:
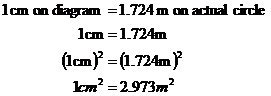
So we need to multiply our scale diagram area by 2.973 to scale it up to the area of the actual circle:
Let’s compare this with the answer we get using our formula for the area of a circle:
Wow! Look how close the answer we get using our strip area technique is to the correct answer, it’s only 0.3 m2 off! Not bad if I may say so myself. The closeness of our answer is probably a little bit due to some luck on getting the strips exactly the right length.
Accuracy using grids and strips to measure areas
If you only use one or two strips or grid squares to represent the entire area of an irregular shape, you won’t get a very accurate answer. With strips this is because when you’re drawing them, the sizes of the areas you’re trying to match up get quite large and it gets hard to draw the strip correctly.

With grid squares, having only a few of them means the area answer you get can vary a lot depending on how you judge whether each grid square is filled or not. You get a very ‘chunky’ answer.
So in general, the more grid squares or strips you use, the more accurate your answer will be. Of course, it takes longer the more strips or squares you have, so you need to decide on a compromise. You should have a rough idea of how long it takes you to do a typical question using a certain number of grid squares. Then when you’re in an exam, you can reduce or increase the number you use according to how much time you have to do the question.
Working out prism cross sectional areas using water
Say you’ve got a prism with a strange cross sectional area (shaded) like this:

If you were asked to find the cross sectional area, it would be pretty hard. One way you might do is to draw a little grid over the end of it and count grid squares. But, given the right equipment, there’s a much easier way to get a fairly precise answer.
We know that the volume of a prism is just the area of the base multiplied by the length of the prism:
![]()
We can rearrange this like this:
![]()
So if we know the length of the prism and its volume, we can work out the cross sectional area (the base area). The length is easy – we can measure that using a ruler or tape measure. The volume we can do if we have a measuring jug full of water. What you need to do is fill the jug full of water, right to the top:
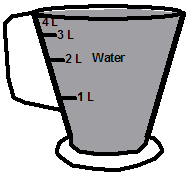
Now take your prism and dunk it completely into the jug of water, so that water runs over the sides.
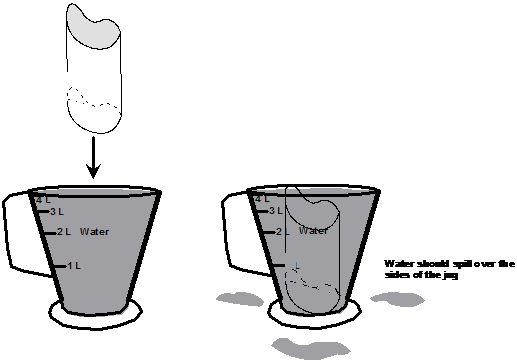
Then what you do is take the prism back out of the jug of water, and you should be left with a lower water level than when you started, because some of the water has spilled over the sides. The amount of water that has spilled over the sides of the jug is the same as the volume of your prism, since that’s what you put into the water. So, by seeing how much less water you’re left with, you can work out the volume of the prism:
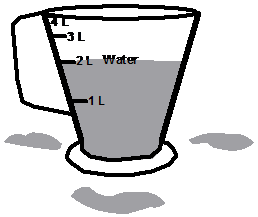
In the diagram, the jug now only has about two litres of water left in it, but when we started it had four litres. This means that we spilled 4 – 2 = 2 litres of water – so the volume of our prism is about 2 litres. If we want to convert this into cubic centimetres, we just have to remember that there are 1000 cubic centimetres in a litre, so our prism is about 2000 cm3.
Say we measured the length of the prism to be 15 centimetres. We can now work out the area of its base or cross sectional area: